This simple baby powder is great for the skin and sweet smelling!
Ingredients:
1 Pound Cornstarch
1/2 tsp. Lavender essential oil (optional)
Add the cornstarch to a Ziplock type bag and add the essential oils slowly. Close the bag tightly and shake until there are no more clumps. Let sit for a few days for best results. Salt shakers work well to evenly distribute the powder, but feel free to be creative and come up with your own containers!
Wednesday, May 12, 2010
Homemade Bubble bath for children (Or Mom) ... (Not Tear Free)
This is not tear free, if you need tear free see my earlier post.
Ingredients:
1 Bar Castille soap (grated) (Or soap of your choice)
1 Quart Water
4 Tablespoons Glycerin (can also use coconut oil, but it tends to be more expensive, and I am allergic to it so I tend to not use it...)
Essential Oil of your choice (Optional, tea tree or lavender are good choices)
Over medium to high heat, add the water and grated soap to a large stock pan. Stir until soap is dissolved. Add glycerin and essential oils if using. Store in a clean container of your choice.
Homemade Tear Free Bubble Bath For Babies and Toddlers
Typically I buy the Walmart brand to save money, although Johnson's has several bath time washes that I absolutely love! Use whatever brand you prefer.
Ingredients:
1 Cup Tear Free Baby Shampoo
1 1/2 Cups Water
Optional:
Food Coloring
1/2 tsp. Glycerin (this is not tear free, even though it is a small amount, I only use this for older toddlers who have learned to not get the water and bubbles in their eyes)
Pour all ingredients into the bottle you are using. I simply refill a previous bottle. Shake well. It will get foamy as you shake it but will settle after awhile and look more like bubble bath. Use as mush or as little as you like!
Homemade Silly Putty
So easy! I love it (and the kids do to)! This was shared with me by a friend a few years back. Works wonders!
Ingredients:
1 Cup Elmers Glue
1 Cup Laundry Starch
Food Coloring
Mix everything together, and enjoy!
Ingredients:
1 Cup Elmers Glue
1 Cup Laundry Starch
Food Coloring
Mix everything together, and enjoy!
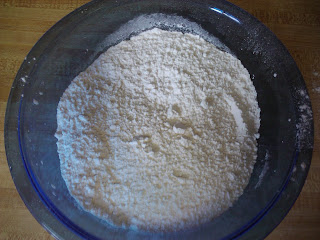
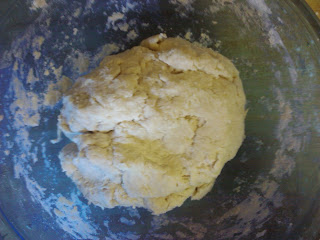
Homemade Playdough!
Who doesn't have fond memories of playing with playdough as a child? I know I loved playdough then (and maybe now too)! Be creative when storing your playdough....empty clean babyfood jars work wonders for storing it!!
Ingredients:
1 Cup Cold Water
1 Cup Salt
2 tsp. veg. oil
food coloring (Use how many drops you want, pictured is 20 red drops)
2 Tablespoons cornstarch
2 Cups Flour
(For some reason the salt did not make it into the picture....maybe a certain 2 year old had something to do with that?)

In a bowl, mix everything except the flour.

Gradually add the flour...I add mine a 1/2 cup at a time. Mix well. Little hands make great mixers!


If dough is too moist, add more flour. Store in an airtight container.
Pictures coming! My phone is sending them to me as I type this!! :)
Friday, May 7, 2010
French Dinner Rolls
These rolls like any dough takes some time to make, but when done properly, they are a great addition to any dinner!!
Ingredients:
4 Cups White Flour
2 tsp salt
1 TBLSP sugar
1/4 Cup Butter, softened
1/2 oz yeast (4.5 teaspoons)
9 oz. lukewarm milk (just over 1 cup) plus an extra tablespoon for glazing

I put a bag of wheat flour in the picture because I usually do 1/2 white flour and 1/2 wheat, but that is up to you!
Directions:
1) Sift the flour and salt together in a large bowl. Stir in the sugar. Rub the softened butter into the mixture until blended.
 2) Cream the yeast with 4 tablespoons of milk. Stir in the remaining milk. Pour into the flour mixture and mix until it forms a soft dough.
 3) Turn out onto a lightly floured surface and knead for 10 minutes or so until smooth and elastic.
 4) Place in a lightly oiled bowl and cover with lightly oiled plastic wrap. Leave to rise in a warm place for about 1 hour. It should double in size.
 5) Turn dough back out onto lightly floured surface and gently knock back. Divide into 12 equal pieces. Shape into balls and space evenly onto 2 lightly greased baking sheets. Using a sharp knife, cut a cross in the top of each roll. Cover with lightly oiled clear wrap and leave to rise again in a warm place for about 20-30 minutes until doubled in size again.
 6) Preheat the oven to 400 degrees. Brush the rolls with milk and bake for 20-25 minutes or until golden brown. Transfer to a wire rack to cool.

Ingredients:
4 Cups White Flour
2 tsp salt
1 TBLSP sugar
1/4 Cup Butter, softened
1/2 oz yeast (4.5 teaspoons)
9 oz. lukewarm milk (just over 1 cup) plus an extra tablespoon for glazing

I put a bag of wheat flour in the picture because I usually do 1/2 white flour and 1/2 wheat, but that is up to you!
Directions:
1) Sift the flour and salt together in a large bowl. Stir in the sugar. Rub the softened butter into the mixture until blended.


Tuesday, May 4, 2010
Basic Cleaning Ideas!
We've all been there...last minute plans and guests about to arrive at any moment! Need some ideas to quickly clean the house? Well, here ya go!
Toilet bowl cleaner: Mix 1/4 Cup Baking Soda and 1 Cup vinegar. Pour into basin and let sit for a few minutes. Simply scrub and flush and admire the clean!
Deoderize the garbage disposal: Depending on what you have on hand, either slice a lemon and send it through or peel an orange and send just the peel through. Either way your kitchen will smell citrus fresh!
Deoderize that musty garage/basement/???: Slice an onion and place slices on a plate in middle of the room. Leave for several hours or overnight.
Basic carpet stain removal: Mix equal parts white vinegar and water in a spray bottle. Spray directly onto the stain and let sit several minutes. Clean with a brush or sponge and warm soap water.
Heavy duty carpet stain removal: Mix 1/4 Cup each salt, borax, and vinegar. Rub paste into carpet and leave for a few hours. Vacuum up!
Monday, May 3, 2010
Remove Crayon Marks From Walls
The fact that this is so simple and works so well still amazes me!! I didn't believe it when I first was told about this so I put it to the test! Well, the results speak for themselves!! My 2 year old is quite the artist, but when his crayon drawings moved from paper to the walls, I knew I was in trouble. If you have the same problem, here is what you need:
Washcloth
Toothpaste
Water
That simple!
 First, wet the washcloth. Smear on some toothpaste and scrub those walls! That simple!
Here is my wall before (the wonderful artwork!)
 And after a little bit of toothpaste and elbow grease!
 And finally the last picture...the final results! My wall returned to its normal state...for now!

Washcloth
Toothpaste
Water
That simple!

Here is my wall before (the wonderful artwork!)


Make your own Febreze for pennies!
I LOVE Febreze! It makes your rooms smell lovely, what is not to love about that? The only thing about Febreze that I do not love is the price tag... Why pay that much when I can make it myself? Here's what you do:
4-5 Tablespoons Downey Fabric Softener(For best results I use Downey with Febreze, but feel free to try another fabric softener. I buy the Downey when it is on sale and I have a coupon to use! Plus I can use the remainder of the bottle for actual fabric softener. To make that last longer I have a trick for that too! But that is for another time!)
Spray bottle (Make sure it is nice and clean!)
Simply add the fabric softener to the bottle and fill almost all the way to the top with warm water. Shake to mix well and start spraying!
Freeze your eggs easily!
I am a Costco kind of shopper! I love to buy in bulk to save $$. Unfortunately, my refrigerator doesn't always have room for everything! Since we have an extra freezer, I have had to teach myself how to easily freeze many items for later use. One thing I learned is how to freeze eggs. Freezing eggs can be a great help! It is so easy and great to use for last minute baking projects! The easiest way I have found is this:
To freeze the whole egg, crack the egg and whisk until blended. I freeze mine individually, but you can do many at once. For one at a time eggs, I place the blended egg in a muffin tin and freeze. Once frozen, pop out of the muffin tin and place in a Ziploc bag. When ready to use, take out one egg at a time and thaw in a bowl in the refrigerator. If you freeze them all together, measure out 2 Tablespoons of egg mixture to equal 1 egg.
Quick, easy and fun for the kids to help with!
Feezing Bananas
We have all been there...you buy a bunch of bananas and by the end of the week there are always one or two that didn't get eaten and are starting to turn brown. What do you do? Well, I love to make smoothies so I take the old bananas and freeze them. There are many idea out there on how to do this, but the way I freeze bananas is like this:
First peel the banana (simple enough)
Second, dip the banana in lemon juice. The easiest way I have found is to put lemon juice in a plastic bag and add the bananas one at a time to get a nice coating. This will help keep the banana from turning brown.
Lastly, place the bananas in a freezer zip lock bag and freeze. I like to freeze in packs of 2 if possible as this is how many I usually add to my smoothies.
When ready to use, simply add the bananas still frozen directly into the blender with your other ingredients and blend!
Another way is to slice the bananas and flash freeze. To do this, simply slice the bananas after dipping in lemon juice and place on a cookie sheet. Once frozen, remove from the cookie sheet and place in a Ziploc freezer bag or Tupperware.
Super easy and makes sure no bananas are wasted ever again!
Tatertot Casserole
If anyone else is like me, they like to cook a lot of food at once, and enjoy dinner from the freezer all month long! I also love freezing leftovers in Tupperware in lunch size servings for the hubby to take to work. This recipe is not only oh so good, but it works perfectly for freezing to cook later or freezing leftovers (if there's any left!)
There are so many variations out there, but this is my family's favorite version:
You will need:
1 lb. ground breakfast sausage (Can also use hamburger)
1 can or small frozen bag of corn (not cream corn, just corn)
2 cans cream of chicken soup (or 1 family size can)
1 Cup of milk
2 cups grated cheddar cheese (or how ever much you prefer)
1/2 of an average size bag of tater tots (or enough to cover the casserole)
Directions:
Brown and crumble sausage as you usually would. Drain fat. Spread sausage as first layer in the bottom of your casserole dish. In a medium bowl, mix cream of chicken soup and milk. Pour half over the sausage in the casserole dish. Next add a layer of corn. Layer the last half of the soup mixture over the corn layer. Spread generously with grated cheese to cover. Lastly, arrange tater tots over the top to completely cover the casserole. Bake at 375 for 50-60 minutes. If tater tots are not crispy, return to oven and bake until crispy.
I do not have pictures right now, but I am making this dish on Saturday and will make sure to take pictures then. Until then, enjoy!
NOTE: 1 of my 3 kiddos will only eat this with ketchup (like any other dish for him!). You can also try adding a layer of diced tomatoes or ?? Be creative!
Subscribe to:
Posts (Atom)